
Connect your own Amazon S3 bucket to Fileflare so files are hosted on your AWS account, not Fileflare’s storage. You control storage costs, bandwidth costs, and retention — Fileflare just acts as the delivery layer between your store and the bucket.
Available on the Growth plan and higher. These are advanced settings — you should be familiar with AWS IAM and S3 buckets before configuring. Cloudflare R2 is generally cheaper and easier; use R2 unless you specifically need AWS.
When you’d use this
- You’re selling large digital files and don’t want to pay Fileflare’s per-GB storage tier.
- Your team already runs in AWS and you want files alongside your other infrastructure.
- You need fine-grained control over bucket versioning, replication, or lifecycle rules.
- You want to upload files directly to S3 (via the AWS console, CLI, or other tooling) and have Fileflare read them.
Set up the AWS side
1. Create the bucket
- In AWS, create a new S3 bucket. Pick any name and region.
- Block all public access (default). Fileflare delivers every download through a signed link that expires, so the bucket never needs to be public.

2. Configure CORS on the bucket
Uploads go straight from your browser to the bucket, so the bucket has to allow them. In Fileflare, go to Settings » Connect S3 storage, click Add connection, and copy the CORS config shown at the bottom of the form. In AWS, go to your bucket’s Permissions tab, find Cross-origin resource sharing (CORS), click Edit, paste the config, and save.
Paste it exactly as Fileflare shows it. Keep * as the allowed origin and ETag in the exposed headers, since large files upload in parts and those uploads fail without ETag.
If your bucket already has CORS rules, you can keep uploads and downloads in separate rules instead: one rule that allows PUT and exposes ETag, and one that allows GET. Fileflare accepts either one combined rule or separate ones. Either way, the bucket must allow GET, because your customers’ online file viewer reads files with it.

3. Create an IAM user with API access
- In AWS IAM, add a new user with programmatic access.
- Attach a policy scoped to your bucket, like the one below.
- Save the Access key ID and Secret access key — you’ll paste them into Fileflare.
Fileflare only needs these actions. Replace your-bucket with your bucket name:
{
  "Version": "2012-10-17",
  "Statement": [
    {
      "Effect": "Allow",
      "Action": ["s3:ListBucket", "s3:GetBucketCORS"],
      "Resource": "arn:aws:s3:::your-bucket"
    },
    {
      "Effect": "Allow",
      "Action": [
        "s3:GetObject",
        "s3:PutObject",
        "s3:DeleteObject",
        "s3:AbortMultipartUpload",
        "s3:ListMultipartUploadParts"
      ],
      "Resource": "arn:aws:s3:::your-bucket/*"
    }
  ]
}
s3:GetBucketCORS is optional. It lets Fileflare check your CORS config when you connect. Without it, that check is skipped, so do a test upload right after connecting.
Connect Fileflare to the bucket
- In Fileflare, go to Settings » Connect S3 storage and click Add connection.
- For Provider, choose Amazon S3.
- Enter your Bucket name and pick its Region (both are shown in your bucket’s details in the AWS console).
- Enter a Folder, such as
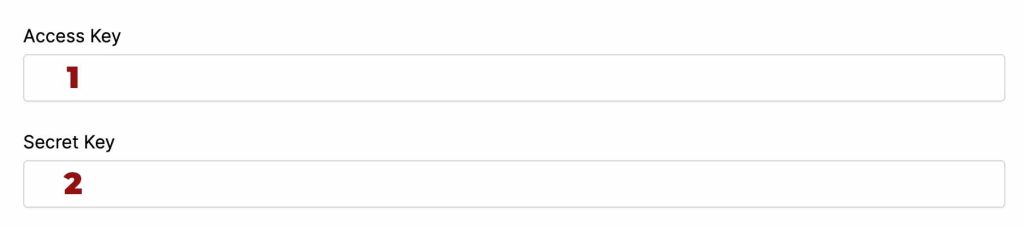
fileflareor your store name. It’s required: new files are stored under it. - Paste the Access key ID into Access key and the Secret access key into Secret key.
- Click Add connection. Fileflare tests the connection before it saves.
- Test by uploading an asset from the Assets page. If it succeeds, you’re done.
Amazon S3 doesn’t need an endpoint, so the form hides that field unless you turn on Use path style endpoint.
Connection options
Use path-style endpoint
Legacy compatibility flag for older S3 clients. Path-style puts the bucket in the URL path; virtual-hosted style puts it as a subdomain. Leave off unless your S3-compatible service requires path-style.
Delete files in S3 when removed from the app
When enabled, deleting an asset in Fileflare also removes the file from your bucket. Off by default — leaving the file in your bucket is the safer default.
Rename my files to keep their name unique
When enabled, uploaded files are stored under a UUID4 filename in the bucket (e.g. 3a7b...pdf). The original filename is kept in Fileflare’s database for display and customer delivery. Prevents accidental overwrites if two uploads share a name. UUID4 renames are one-way — they can’t be reverted.
Common issues
- Upload fails with a CORS error — the CORS config wasn’t saved on the bucket, or it was changed. Copy it from Fileflare again, paste it unchanged, and save.
- The connection test fails its CORS check, but you set CORS up — check that your rules allow
PUTwithETagexposed and allowGET, whether that’s in one rule or two. If the access key has nos3:GetBucketCORSpermission, Fileflare skips this check instead of failing the connection. - “Access denied” on upload or read — the IAM user’s policy is missing an action. Compare it with the policy in step 3.
- “Unable to connect to S3 bucket” — check the bucket name, the region, and both keys.
- I disconnected S3 and my files disappeared — if you had Delete files in S3 when removed from the app enabled, removing assets in Fileflare also wiped them from S3. The setting is destructive — leave off unless you specifically want sync-delete behavior.
FAQ
Can I switch the connected S3 bucket later?
Yes. Add the new bucket connection and mark it primary. Existing files stay on the old bucket; new uploads go to the new one. To migrate old files, use Replace asset on each — the file gets re-uploaded to the new bucket.
Can I use multiple S3-compatible buckets?
Yes — Cloudflare R2, Backblaze B2, DigitalOcean Spaces, Wasabi, and others all work via the same custom-S3 connection.