PDF stamping watermarks every PDF Fileflare delivers with the buyer’s details — name, email, order number, billing address, or any combination — so a leaked file is traceable back to the original customer. Combined with print and annotation locks, it’s the strongest deterrent in Fileflare for stopping casual file sharing.
Available on the Basic plan and higher. Multiple stamp templates per store require Growth or higher. Stamping only works on PDFs you upload directly to Fileflare (not URL assets hosted elsewhere) and the file must be under 100 MB.
When you’d use this
- You sell ebooks, manuals, patterns, sheet music, or any PDF you don’t want resold or freely shared.
- You want each delivered PDF to carry the buyer’s identity — useful for licensed content, professional reports, or anything where attribution matters.
- You want to lock printing or editing on top of stamping so the buyer’s name can’t be removed or stripped.
How to use it
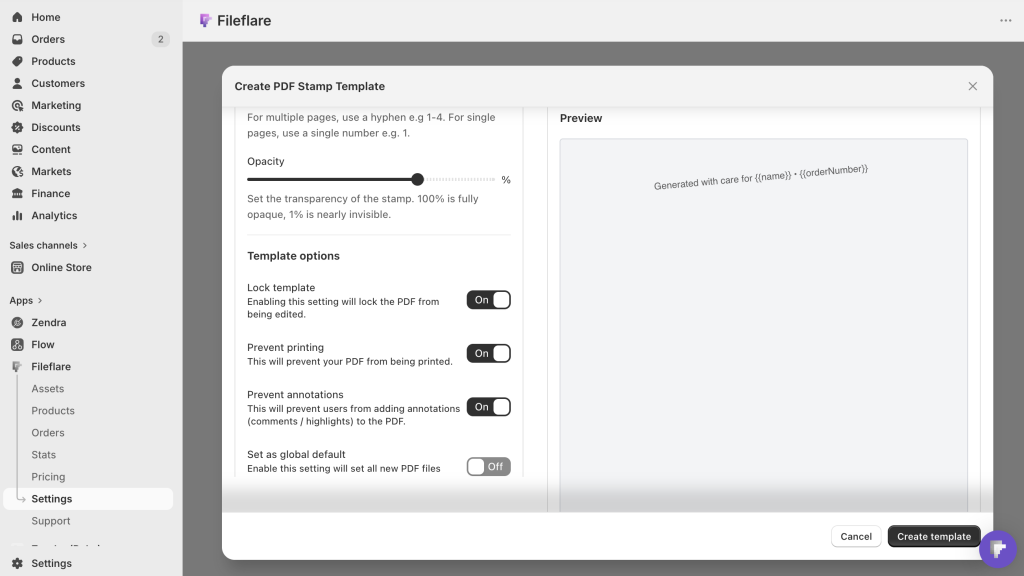
1. Create a stamp template
Stamp templates live separately from your assets — create one template and apply it to as many PDFs as you want.
- In Fileflare, go to Settings → Branding → PDF stamp templates.
- Click New template.
- Write your stamp text using any combination of plain text and merge variables (full list below).
- Set the styling — color, opacity, font size, position on the page, and rotation.
- Choose which pages get stamped (all pages, or a specific range).
- Optionally enable print lock and annotation lock to prevent the customer from printing or editing the stamped output.
- Save the template.

Available merge variables
{{name}}— customer’s full name{{email}}— customer’s email{{orderNumber}}— Shopify order number (e.g.#1042){{orderId}}— numeric order ID only{{orderDate}}— date the order was placed{{orderExpiry}}— order expiration date if you’ve set one{{company}}— company name on the order, if provided{{billingAddress}}— full billing address{{shippingAddress}}— full shipping address{{orderIp}}— IP address Shopify recorded for the order{{phoneNumber}}— customer’s phone number, if one is on the order{{orderProductQuantity}}— quantity of this asset’s product(s) in the order{{lineItemProperty[Key]}}— value of a line item property, e.g.{{lineItemProperty[Recipient]}}
Line item properties are the custom fields Shopify captures on individual items at checkout — a gift recipient, an engraving note, or a chosen format. When you build a stamp template, Fileflare suggests the property keys your store has used on recent orders as click-to-insert chips, and you can type any other key by hand with {{lineItemProperty[Key]}}. Hidden Shopify properties (keys beginning with _) are skipped, and each property resolves against the line items for the stamped asset’s product.
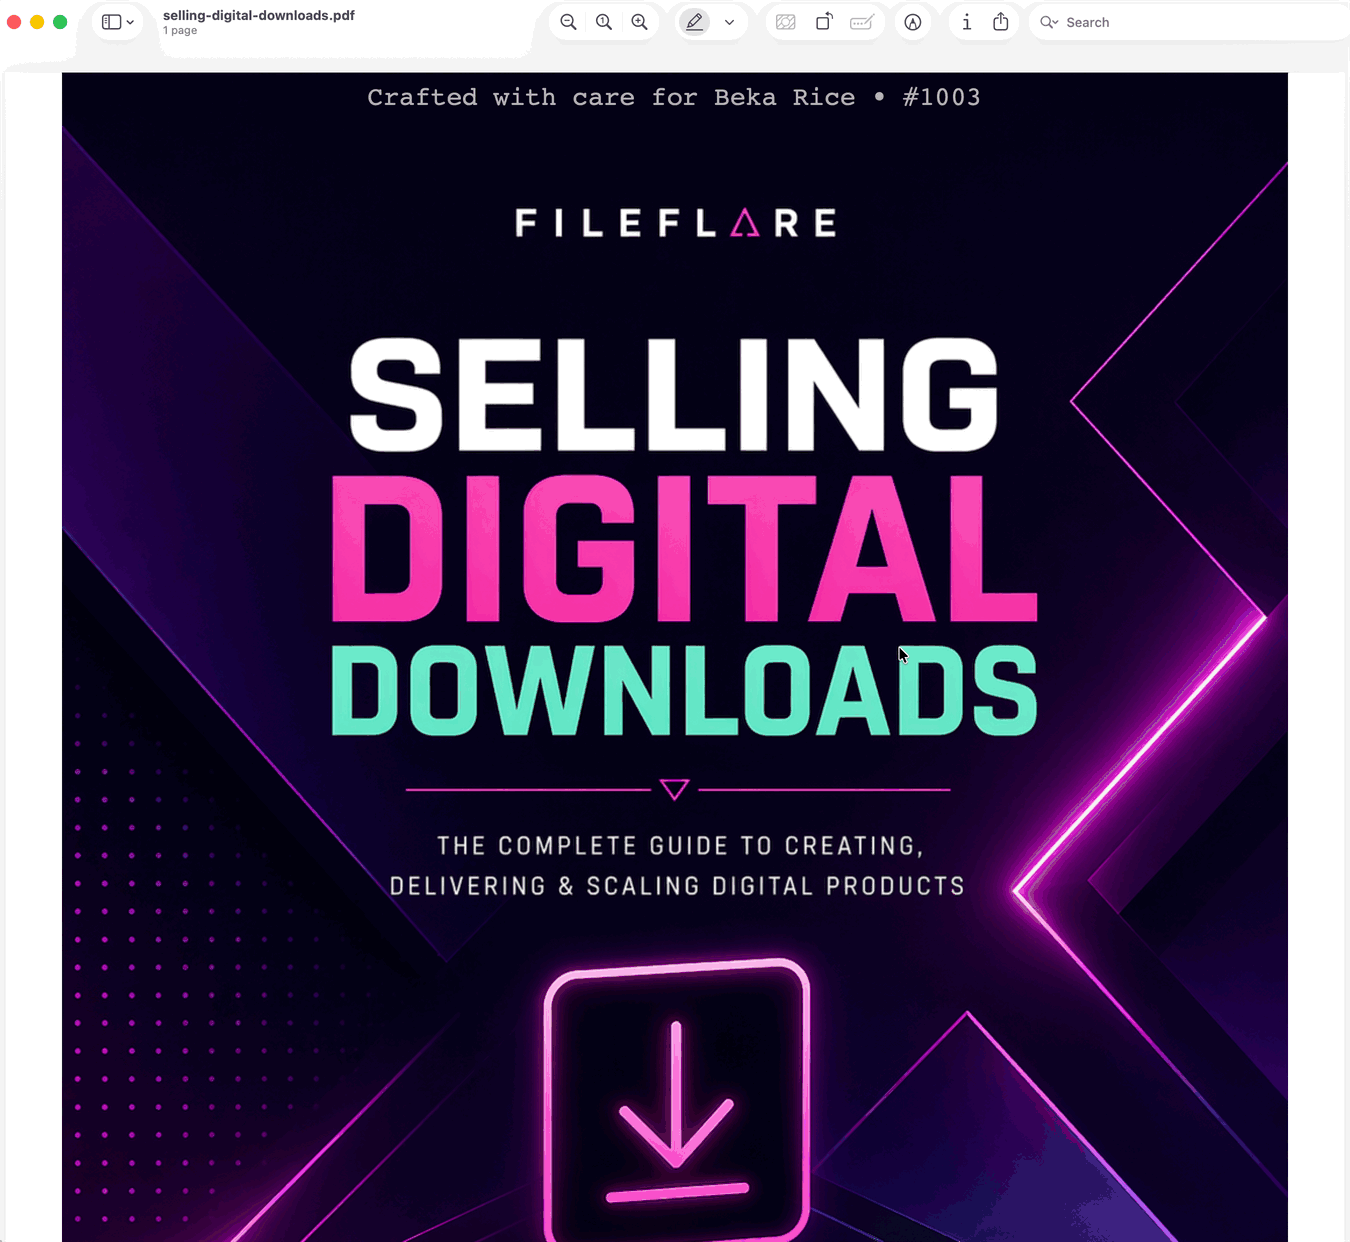
A common pattern: Licensed to {{name}} ({{email}}) — Order {{orderNumber}}. Subtle enough not to ruin the reading experience, identifiable enough to deter sharing.
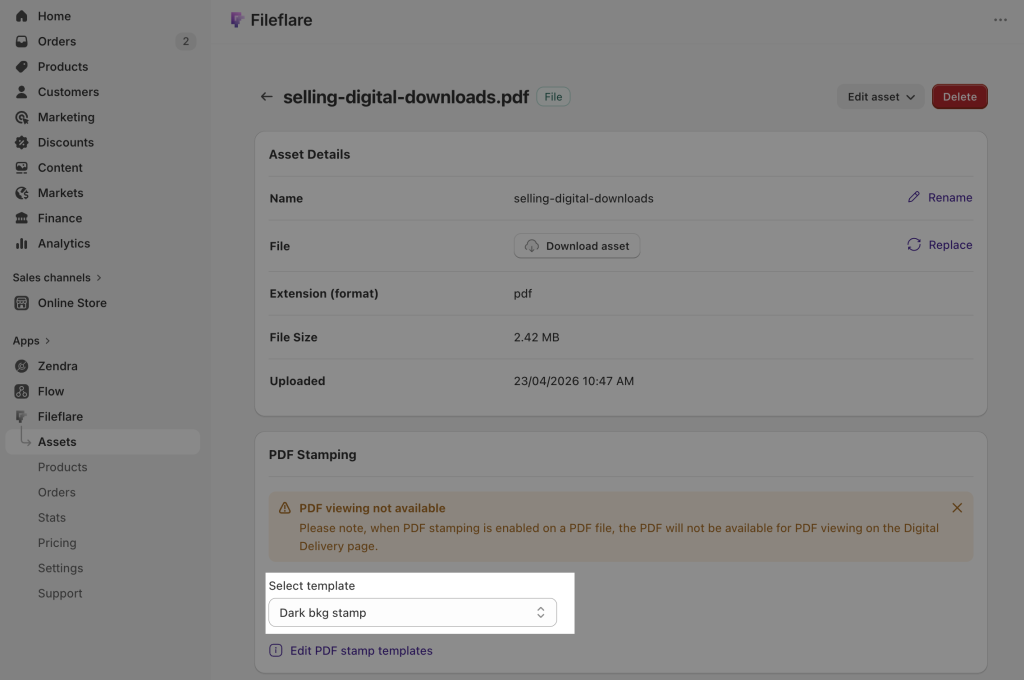
2. Apply a template to a PDF asset
- Go to Assets and click on a PDF asset.
- Find the PDF stamping section.
- Choose a template from the dropdown. You can also override page targeting per asset (handy if a particular PDF only needs stamping on the title page).
- Save the asset.
The same template can be applied to as many assets as you want. If you want every PDF in your store stamped the same way, set up one template and apply it to all PDFs in bulk.
3. Test the output
Before turning customers loose, you can preview a stamped PDF without placing a real order:
- From the asset page, click Download asset. Fileflare will generate a stamped copy with placeholder data so you can review the placement, color, and readability.
- For an end-to-end test, place a test order on your store using one of the stamped PDFs — the delivered file uses your real buyer info.
4. Add an image stamp (logo overlay)
In addition to text, you can overlay an image — typically a logo — on every page of the PDF. Set this up in the same template editor: upload an image, position it, and set its opacity. Image stamps and text stamps can be combined on a single template.
5. Apply stamping retroactively
If you turn on stamping after customers have already purchased a PDF, you can backfill the stamps so even past buyers receive a stamped copy on their next download. The stamp is generated at download time, so as soon as the template is applied to the asset, every download from that point forward — including from old orders — will be stamped.
No reupload, no manual reprocessing. Just attach the template to the asset.
Common issues
- Stamp doesn’t appear on the downloaded PDF — first, confirm a template is selected on the asset (Assets → click the PDF → check the PDF stamping section). Most “missing stamp” reports are from this step being skipped.
- The PDF is password-protected — Fileflare can’t modify locked PDFs. Re-export the file from your PDF software without a password and replace the asset.
- The file is over 100 MB — stamping has a 100 MB limit. Compress the PDF (Adobe’s compressor is reliable) and replace the asset. As a guide: a 100 MB PDF is roughly several hundred pages of high-resolution, image-heavy content — most ebooks and manuals are well under 5 MB.
- The file extension isn’t
.pdf— Fileflare detects PDFs by extension. If the file is named.PDF,.pdf.txt, or anything other than.pdf, stamping won’t apply. Rename and reupload. - You’re using a URL asset — stamping requires Fileflare to host the file directly. If the PDF is delivered as a URL (e.g. linking to Dropbox or Google Drive), there’s no way to stamp it. Upload the PDF to Fileflare instead.
- The PDF has thousands of pages — very large page counts can be slow or unreliable to stamp. Restrict the stamp to specific pages — e.g. just the title page or first chapter — using the Pages field on the template (formats:
4for a single page,2-4for a range). - The stamp is there but invisible — check the color contrast against the page (a light gray stamp on a white page is easy to miss), the opacity (set above ~30% to be readable), and the font size (≥10pt for body pages, ≥18pt for cover pages).